A sump pump is an essential piece of equipment for any home, but installing one can be a daunting task. Before you get started on the job, though, you need to know how to install a sump pump and what it’s used for. After all, this isn’t just any old plumbing project—it’s much more complicated than that! So follow along as I walk through step-by-step instructions on how to do just that:
Determine if you need a sump pump.
Determine if you need a sump pump. You should look for signs of water seepage, water damage, and leaks in the basement.
If you see any of these signs, it’s likely that your home needs a sump pump installed.
Pick the right place for your sump pump.
You should choose the right place for your sump pump. The pump should be as low as possible, in a dry area, and away from any electrical outlets or water pipes. It should also be easy to access so you can clean it easily if something goes wrong with it.
Figure out where the pipes will go.
The first step is to figure out where the pipes will go. You’ll want to place your sump pump in a low-lying area near the entry point of water, so it can catch large amounts of water quickly. If you have an old house with no basement, this may not be possible—but if you do have one and it’s occupied by furniture or other items that could get damaged if they’re submerged by floodwater (such as plants), then this will help keep them safe from damage during future flooding events.
You should also make sure that your pump is close enough to its intended location so that there’s easy access for maintenance purposes; otherwise, if something goes wrong and needs fixing after the installation has been completed (e.g., broken wiring), having some distance between where power is coming from would come in handy when looking for tools needed for repairs or replacements later down the road when needed most often!
Dig your sump pit.
Dig a hole to accommodate the sump pump. Make sure you have enough room for the pit and pipe, as well as any other appliances you might want to install in your sump pit (such as a dishwasher).
Make sure the water level in your basement is low enough that it can drain out easily after installing your sump pump.
Ask a friend to help you with installation.
If you’re not sure how to install a sump pump, ask a friend or family member to help. You can also hire a professional. For example, if you need someone who knows what they’re doing and has experience in this field, try calling up one of our sales representatives at [insert company name here]!
If your friend or family member is willing and able but doesn’t have any technical knowledge about installing sump pumps themselves, then ask them if they’d like some extra cash for their trouble (we’ll even throw in some freebies). They might even be willing to offer up their services as an installer!
Set your sump pump into the pit.
Make sure that the pit is at least 6 inches deep and 1 foot wider than your sump pump. If you don’t have a large enough pit, there’s no need to worry about this step—you can just install your new sump pump somewhere else in your home instead!
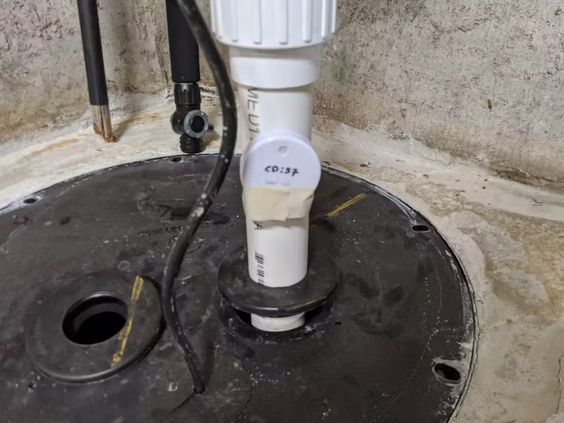
Make sure your pump is airtight.
When you’re installing a sump pump, make sure that it’s airtight. To test for airtightness, first, turn off the power to your home and then open up the cover of your sump pump. If there’s any air inside, this could cause problems with how well your pump works.
If you have an electric sump pump, try using compressed air to blow out any crevices or cracks in its housing before filling it up with water so that no more leaks occur later on down the line during use! Also, check all other parts of your installation (such as pipes) for signs of leaks before continuing on step two below:
Pump away excess water and test the system’s capacity.
After you’ve completed the installation, you need to test the system’s capacity. The easiest way to do this is by using an empty bucket or container and filling it with water. Next, turn on your sump pump just enough so that water starts flowing out of the sump pit and into a container. If there are no leaks in your home’s plumbing system, then this should provide plenty of room for overflow without overflowing too much—but if there are signs of any problems (such as clogged pipes), then it might be time for professional help!
Once your new pump has been installed successfully and tested successfully by checking its capacity against an empty bucket filled with water (see above), you can start enjoying all those benefits that come along with having one installed: lower monthly bills thanks to less frequent repairs!
You can install a sump pump on your own by following these steps:
Find the right size of sump pump for your home. Your local hardware store should have this information available, or you can consult with an experienced plumber about what size would be best for your situation. If you’re installing a new sinkhole and have no idea where it is, try checking out [our website](https://www.crawlspaceproblemsonline.com/) for tips!
Purchase a rated model from any reputable manufacturer like Rainbird or Toro (both brands make quality products). You’ll want to choose one that has high flow rates so there will not be any issues with being able to flush water out quickly enough before flooding occurs inside the crawl space area itself – which could cause damage if left unchecked long enough without attention being given sooner rather than later!”
Conclusion
If you’re looking to install a sump pump in your home, we’ve got you covered. Just follow our step-by-step guide and you’ll be well on your way to installing the perfect system for your needs.