

Introduction
HubSpot has a built-in birthday field. You can use it to track your contacts’ birthdays and send them an email or card. But what if you want to customize how this field works? You may have heard about the Center on date workflow, which allows you to create custom fields for each contact. In this tutorial, we’ll show you how to add a birthday field to your HubSpot portal so that when people sign up for your service they can enter their birthdays easily!
Step 1: Log in to the HubSpot Admin Panel
Step 2: Click on the Contacts menu option.
Step 3: Select the “Fields” tab on the left-hand side of your screen.
Step 4: Click on the “Create” button.
Step 5: Select “Custom Field” as the type of field you’d like to create.
Step 6: Enter a name for your new field. You can enter anything you like, but we recommend something descriptive (i.e. Birthday) so that people know what it is when they’re using it in their HubSpot portal.
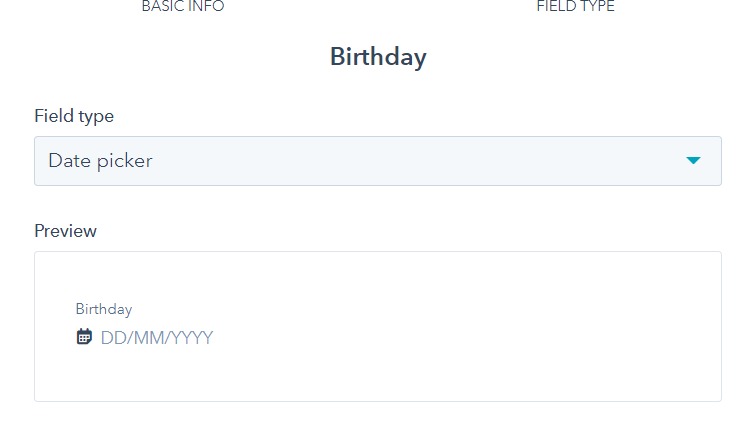
Create a Date property in your HubSpot portal
To create a date property, follow these steps:
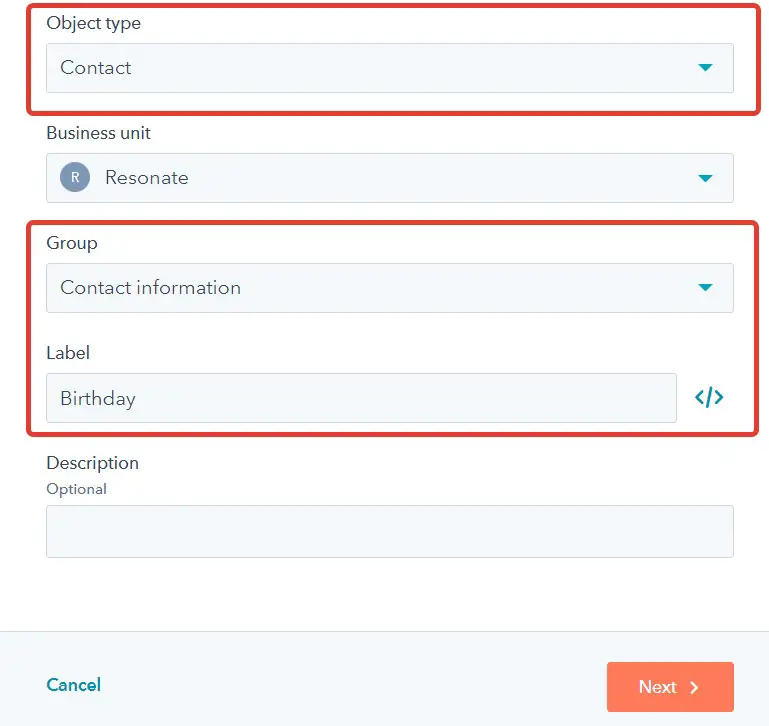
- Go to the properties page.
- Click Add a new property.
- In the Name field, enter the name of your new field and make sure it’s unique for all fields in HubSpot (for example, “Birthday”).
- In its Type field, select Date from the drop-down list and click Done when finished selecting options for this field’s type (more on this later).
If you’re using Google Apps for Business or Office 365 with Microsoft Exchange ActiveSync enabled then there may be additional configuration required for proper formatting before adding this new property into your HubSpot portal settings pages
Add a birthday field to the default view
- Go to the default view
- Click on the new field button
- Choose Birthday from the list that appears and click Save
When you add a new field to the default view, HubSpot automatically assigns it to the first contact. If you have multiple contacts in your account, HubSpot will not automatically assign this new field to all of them. You’ll need to manually assign it or use one of the methods above (i.e., using a script).
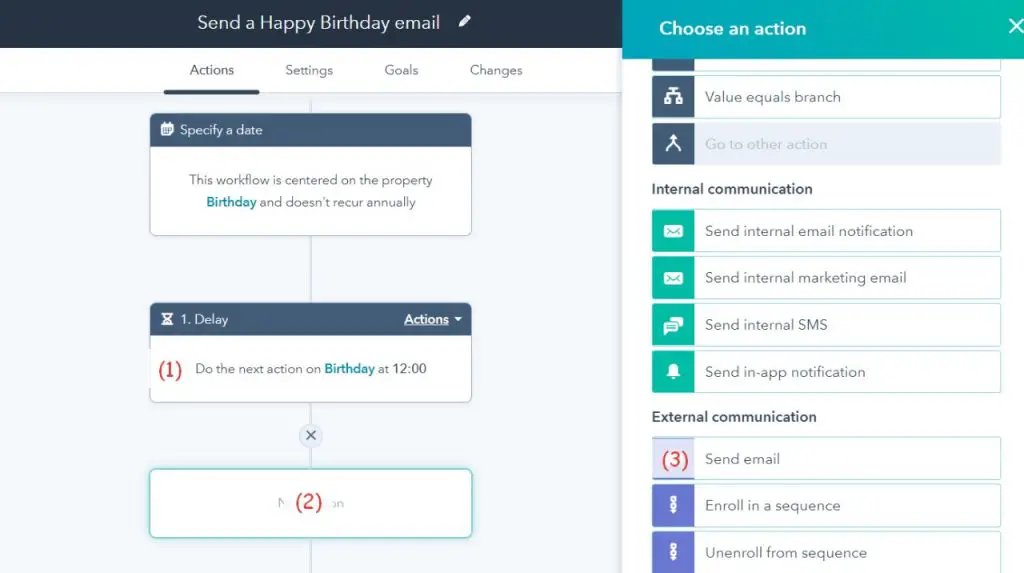
Create a Center date workflow
The first step is to create a workflow. You can do this by going to your HubSpot Dashboard and clicking on Workflows in the left sidebar.
After that, you’ll need to define the date range for when you’d like this task to run. For example:
- “From” will be set from now until June 30th (6/30).
- “To” will be set from June 30th until July 31st (7/1).
The trigger for sending out emails or cards is where we’ll enter our birthday message here!
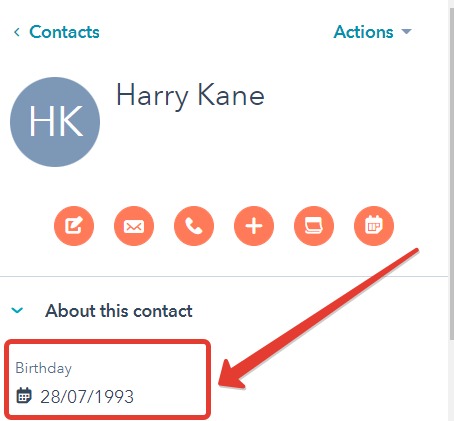
You can create birthday fields for your contacts in HubSpot.
You can create birthday fields for your contacts in HubSpot.
- Create a birthday field on the default view of your contact information page.
- Create a Center on Date workflow that includes the birthday field as one of its conditions.
- Set up an email template that has a date property set to “birthday” so you can easily remind users of upcoming birthdays without having to check their own calendars or reminders every time they sign up for an account!
Conclusion
This post showed you how to add a birthday field to your HubSpot contacts. We also covered some other features you can use for your customers and prospects. If you’re looking for more information about HubSpot’s contact management system, check out our articles on setting up notifications and using CRM integration with HubSpot.